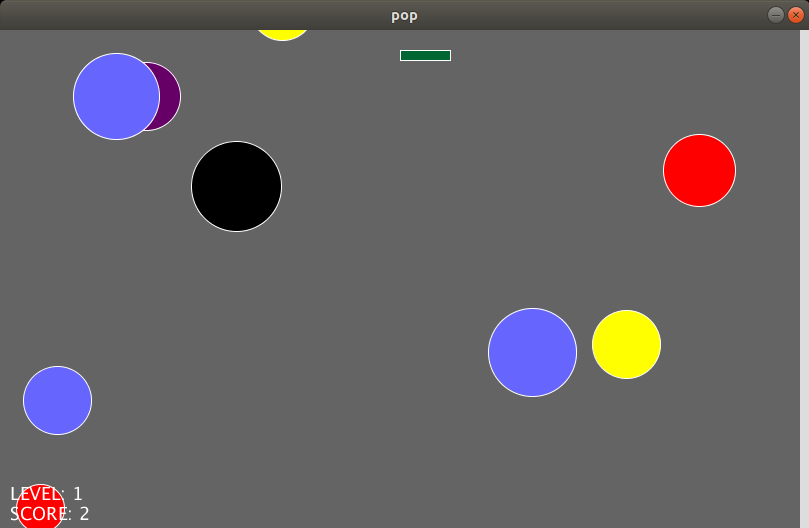
Roll-a-Ball Tutorial

To get things rolling (pun intended), I started off by walking through the classic Roll-a-Ball Unity tutorial. In many aspects, this tutorial continues to be a great introduction to not only Unity as a whole, but also to the scripting-side of Unity. As will be discussed in the following section, Unity is highly supportive of those who do not wish to write a single line of code. With this tutorial, however, you can get a good feel for both the non-programming side and the C# side.
To start things off, I had to decided which version of Unity I wished to use. I knew going into this project that dealing with versions would be an issue, but I had no idea just how much of an issue that would end up being. A sizeable portion of the hours spent on this project have been juggling packages and trying to learn how 2019.3 has decided to do things differently. Luckily, Roll-a-Ball is simple enough that there wasn't much difficulty here since no special packages are need. Yet another great perk of the tutorial.
My partially completed implementation of the game can be found in this project's GitHub repository
here
.
Shader Graph
The real driving force behind deciding to use Unity for this last project was getting to play with Shader Graph. For the previous assignment, we were tasked with building and using shaders and some of my classmates decided to use Shader Graph. I was very intrigued by their descriptions of it being a means of seeing the results of your shader manipulations as you develop your shaders.
This is the point at which I found the Brackeys Youtube Channel. I landed upon their
"Basics of Shader Graph - Unity Tutorial"
video and after watching it, began following the steps that were laid out. However, this is when I ran into my first issues with the Unity Render Pipelines. As noted in the video, to use Shader Graph, you need the Lightweight Render Pipeline installed. This turned out to be a headache, especially when I found out that in order to get bloom, I needed to set up some Post Processing items. This was very frustrating, especially since I am using the latest version of Unity 2019, which is recent enough to warrant not much relevant online help.
With the Lightweight Render Pipeline somewhat set up correctly, I was able to follow Brackeys' Basic Shader Graph tutorial as well as his dissolve tutorial. I also begin following his force field tutorial, but stopped part way because I realized that I needed to set up the High Definition Render Pipeline, since that was the tutorial setup.
Using Shader Graph was quite nice. The visual format, with its nodes and connections, can be very straight forward. The biggest drawback I had was knowing what node that I wanted or needed. Since I was following tutorials, that wasn't a very great struggle, but I could imagine it being more than just a small hindrance when trying to make your own custom shader. Once you gain a good grasp of the available nodes, however, I feel as though this could be an even more helpful tool.
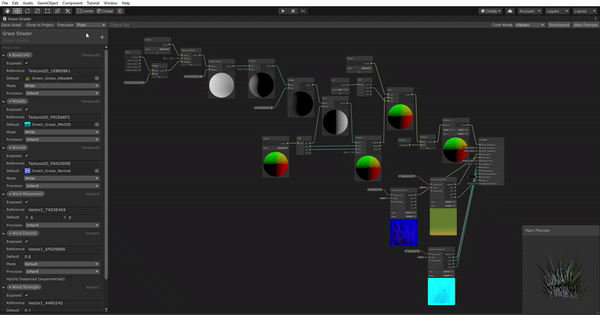
The visual aspect is very helpful for a higher level understanding; for seeing the flow of data and how the pieces contribute towards the final effect. However, gaining a lower level understanding can be much more difficult because of the abstractions the nodes represent. When trying to follow along with the force field tutorial, I quickly got lost with the calculation needed to "detect" where the force field intersected with other objects in the scene. This was done as shown below in Figure 3.

One big area of confusion was what the Screen Position and Scene Depth nodes really represented. The online documentation on the nodes was helpful, but those extra steps are necessary if you wish to understand the underlying math. In order to create a shader from scratch, you need to understand at least some of the underlying math. What comes to mind is the fog shader we discussed in class. I say "at least some" since there are often a number of hacks or simplications that can remove the more complicated steps, as we did in class. However, if none of the math was understood at all, it wouldn't be possible to create your own fog shader. This is not quite the case with Shader Graph which is both a plus and a minus.
After working on the more simple shaders, I then tackled the grass sway shader. This tutorial excited me because of its use of vertex displacement and its overall complexity. This was a case where I didno't struggle to comprehend what was happening in Shader Graph once I gave it some thought. Going into it with an understanding of vertex displacement made it easy to understand which nodes were necessay and displayed a definite strength of Shader Graph.
Procedural Mesh Generation
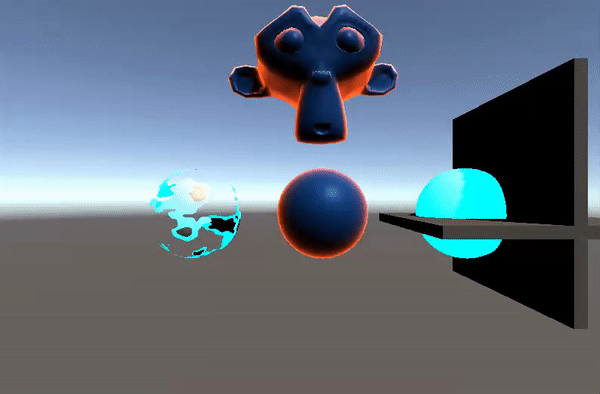
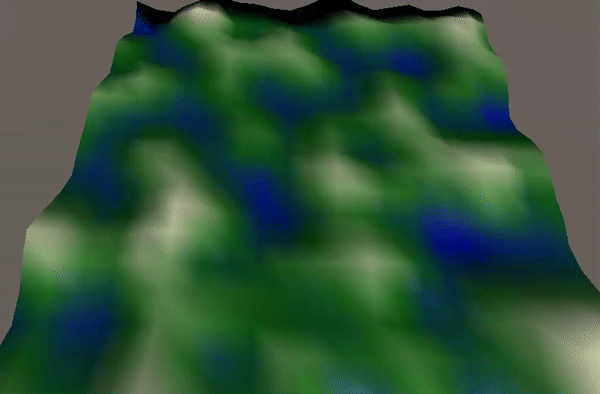
After playing around with Shader Graph for a while, I saw another Brackeys tutorial about Mesh Generation and thought it sounded fun. After mucking around with a visual, node-based system for a while, it was refreshing to create some C# scripts and write some code. The tutorial walked through using Perlin Noise to generate pseudo random noise and easy create a terrain with somewhat realistic changes in height. With Unity's extensive libraries, it was as simple as making a single function call, shown below in Snippet 1. Unlike the tutorial, however, I made a new "noisiness" parameter which is available to the user. This parameter is what I am changing to get the effects shown below in Figure 4.
Putting it all Together and Future Work
After playing around with tutorials, I had a lot of trouble trying to see how I could combine everything into one cohesive project. After completing the grass sway tutorial, I had the thought to procedurally generated mesh and also place swaying grass along it, depending on the height of the mesh. Since the beginning of this project, I thought I had wanted to create a 2D game with essentially a camera fixed at a certain offset from the player. I thought maybe I could generate mesh as the player moves and add swaying grass for them to walk through, all while the player views the scene from a 2D perspective.
I set out to work on this and, since the grass swaying needed to be implemented using the High Definition Render Pipeline, thought it only natural to continue to use it for this somewhat cohesive "game." However, importing my mesh generation from a project using the Lightweight Render Pipeline, did not work immediately. My vertices were being generated where I wanted them to be, but I had no triangles displaying. I knew my vertices were calculated correctly because of this very helpful debugging function Brackeys had implemented in their "PROCEDURAL TERRAIN in Unity! - Mesh Generation" video, shown below in Snippet 2.
If my vertices were there, and I was setting the triangles of the mesh just as I did previously, why wasn't I seeing any triangles? After going through some more of the 2019.3 documentation on Mesh Filters, it turned out that for 2019.3, I also needed a Mesh Renderer in order to see the triangles of my mesh. But a Mesh Renderer required a material and therefore didn't allow me to apply a gradient to the vertices as I had done previously, following Brackeys' "MESH COLOR in Unity - Terrain Generation" tutorial. The simple blue to green to white gradient can be seen above in Figure 4. This gradient was simply applied by linearly interpolating between the heights of the vertices to determine where along the gradient that specific vertex fell.
After abandoning the hope of coloring my generated mesh, my next steps were to place a player sphere that I could control and also to place grass on the mesh. I simply copied my player controller script from the Roll-a-Ball tutorial and now I had a player. But the grass bit seemed more difficult. I started with a somewhat silly idea of dropping the grass onto the terrain randomly to see how that would turn out. However, to allow physics-based behaviors, a Unity GameObject needs a rigid body component. Once I got the grass dropping at random locations, I saw that this was not at all the behavior that I wanted. They would tip over and roll about sometimes, but worst of all, they interacted with the player sphere, which had its own rigid body. The player wasn't allowed to go through the grass anymore because they were both physical rigid bodies and, as the name suggests, rigid bodies cannot pass through each other.
Because of the amount of time I had left, and because of the need to complete this writeup, I decided to stop developing at this point, leaving much room for future work. A few items I wish to continue working on are as follows:
-
Allow player to move through the grass clumps
- either just passing through or applying its own vertex displacement to move the grass out of the way)
-
Generate more mesh when the play reaches the edge of the current mesh it is on
- I imagined a MeshManager of some kind that would use the vertices at the end of the current mesh when creating a new one, in order to seamlessly join the two
-
Color the mesh
- as explained above, because of the need of the Mesh Renderer to have a material to apply to the triangles, I was not able to color the vertices- there are possibly ways to do this by texturing the mesh with a custom texture
-
Better player movement
- currently, the movement is through the player being pushed by forces, but this movement isn't very conducive to a 2D game with the player rolling up and down hills because it's difficult to control precisely
Verdict on Using Unity
Package juggling and juggling versions was a pain. With such a popular, constantly developed engine like Unity, there are so many updates being pushed out that it can be very tempting to stick with an older version. This is a case where I feel as though I should not have jumped into 2019.3, although, I'm sure I would've had a whole new set of issues had I used a 2018 version. These issues are one major difference between using your own custom engine and a large, publicly deployed game engine like Unity. A custom engine is very unlikely to have such a high setup cost because of its size and the fact that it likely isn't as complex. Something I found very surprising about some of the errors I was receiving was missing functions or references to types that don't exist. I understand that Unity is expanding rapidly, but I was surprised at its lack of backward compatibility. However, once I realized that it must be that I had out of date packages, and I had
updated them all, then things were fine.
Overall, it was quite a pain to use Unity. It tries to be able to do so much, and it can do so much, but that is also a major downside. I honestly felt as though half of my hours were spent banging my head against versions and wondering why things where black or not showing up even though I had followed the tutorial. I will admit that Shader Graph was very fun and impressive, however somewhat slow on my laptop at times. I hadn't looked to see if this was possible, but I would very much like to see the shaders Shader Graph generated. It did not seem readily apparant that these were available, but I would hope that they are so that those of use that like to dig a little bit deeper can see the outcomes of playing with Shader Graph.
Tutorials